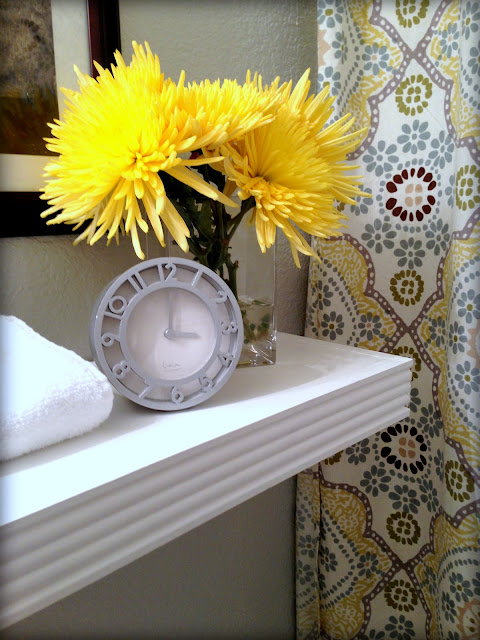
I'm proud to say that I had a pretty productive weekend. I started a few projects, and yesterday I actually finished one! I mentioned my floating shelf drama here, and was prepared to spend a little bit more money to get a quality shelf. But then I decided that I would just take matters into my hands and make one. I like the look of big chunky shelves, but I never want to spend the money on them. I've seen a couple tutorials for shelves in the past, and decided to give it a try myself. I love how it turned out!
Supplies
*7 or 8 in. wide board
*2 Corbels
*Door Casing
*liquid nails
*Wood Filler
*Paint
First step is to cut your board. I just bought a thin shelf that was already the size I needed so I didn't have to do any sawing. Next, cut the door casing at 45 degree angles to fit around the sides of the board.
Once everything is cut, glue the molding on by running a bead of liquid nails along the side of the board. I also added a few small nails to the sides for extra support as well.

Once everything is dry, fill in any holes with or cracks with wood filler or spackeling. After that, paint the shelf and the corbels! I then glued the corbels onto the shelf and added a few nails for extra support. And that's it, done! It was so easy and only cost me about $25. I already had the paint and liquid nails, so it would cost more if you didn't already have some of the supplies.
And here she is! I shopped my house for a few things to put on it for these pictures, but now I'm off to the store to get some real accessories!
I love how it has the look of a thick, chunky shelf, but is actually just a piece of wood and some trim.


Love it!! Great job! I'm thinking about making some for over the toilet in our ensuite. Thanks for the inspiration!!
ReplyDeleteWOW- you are crafty! The shelf turned out great, and I love your shower curtain, too! :)
ReplyDeleteI love how you made it look so thick! It looks gorgeous; you did a fantastic job!! Great tutorial too!
ReplyDeleteTotally impressed! I love your styling, too! :)
ReplyDeleteI love it! Thick and sturdy!
ReplyDeleteLooks great! And I love the daisy!
ReplyDeleteIt looks so great. I pinned this for a future project for me!
ReplyDeletexo Nancy
Powellbrowerhome.com
ReplyDeleteI love how you made it look so thick! It looks gorgeous; you did a fantastic job!! Great tutorial too! I love you blog
angelica
You're quite the handy-woman. Love the crisp white!
ReplyDeletexoxo
Kerry